
This is the clock I’m going to show you being made. I’ll explain each stage I go through and try and offer suggestions for things you can use if you don’t have the same equipment available.
In 2017 one of the images of a book clock I had made ended up on social media with a reply to a comment by a potential customer that read “Make one, easy enough.” On a business page this can have some unfortunate consequences and isn’t the same as conversations people who want to replicate what you make have in front of a craft stall or when they privately message each other.
The comment sat there making anyone who was thinking of buying the item feel they were being judged for paying for something they could easily make themselves. If I’m honest this sort of comment isn’t the best thing to read if you are someone who easily doubts themself either. Fortunately I have lots of happy customers and sold many clocks this year so I can keep believing in what I make.
Instead of leaving it as a bit of a negative experience I decided to create a how to post so that people who want to (and have the spare time) can make their own book clock. As it was getting towards the end of the year I was very busy both at my day job and with The Forgotten Library so I never quite got round to it. Now I finally have a day I don’t have to be somewhere else and thought people might enjoy this as a new year project; so if you want to make a book clock here’s how.
Of course it’s ‘easy enough’ so you might want to do things a different way but this is my method 😉 It usually takes up to 3 hours of working time and you will need to allow 24 hours for setting the book too. Sorry the photos aren’t the best as I took them hurriedly, often in poor light, of the next clock I made after that comment appeared.

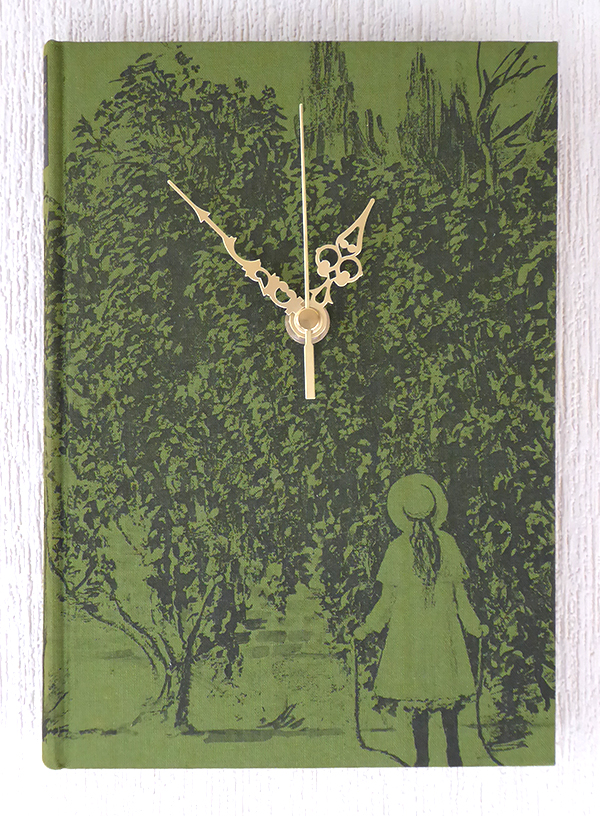
Select a suitable book. It needs to be a hardback and no more than an inch thick. As you cut the pages to make space to put the clock movement in, the square you are cutting will start to shift. You can keep compensating for this but it becomes more complicated if the book is too thick. I’ve used a Folio Society edition of The Secret Garden by Frances Hodgson Burnett here which I was lucky enough to buy for £5 from a shelf of books being sold to raise funds for a church I visited when on holiday in 2016.

Mark where you want the clock hands to be set on the front cover using an awl. Turn this so that it goes through the front cover and makes a clear mark on the first endpaper of the book.

Use the hole you have marked as the centre point to draw a square large enough to house the clock movement you are using with extra space around it. For example the movements I use are 5.5cm square and I cut a hole that is 7cm square. I think you can still buy a parallel rule at a stationers or art shop, this is an Air Ministry issue rule that I bought from an antique shop.

Cut the square using a metal ruler to guide the knife so that you don’t cut into a wooden or plastic ruler. My metal ruler came from a car boot and the knife from a craft shop.

After cutting through a few millimetres of pages keep redrawing the square ensuring it stays central. You will find as you turn the pages and work on the next group the square you are cutting can start to slope on the left and right hand sides so you need to counter this as you go.
Eventually you’ll reach the back of the book. Make sure you have a cutting mat in place as you get towards the end as you don’t want to scratch the surface you are working on. The cover is usually harder to cut through so take care (the point of the blade has snapped off on me at this stage a few times).
Once you’ve completed the cut you need to apply pva glue and let that set so that you have a solid book to work with.
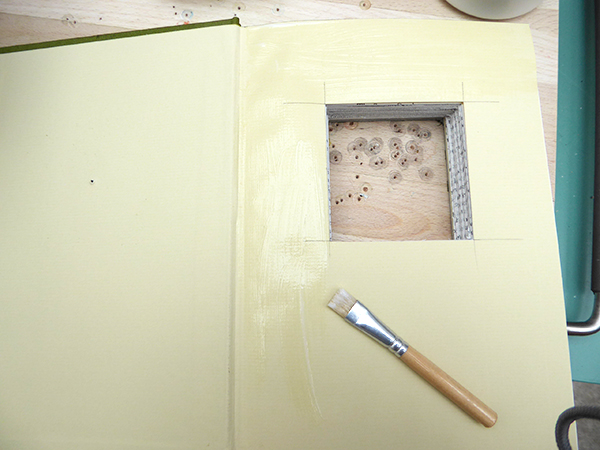
I apply glue to the endpapers front and back first.
Next I’ll brush the glue along the page block edges.
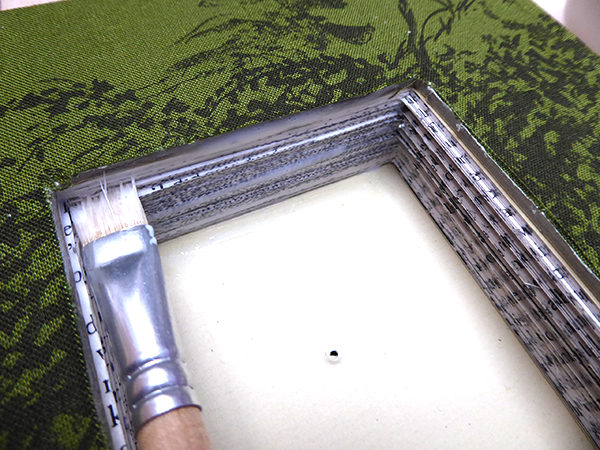
Finally I’ll put glue all around the pages exposed in the cut out section of the book.
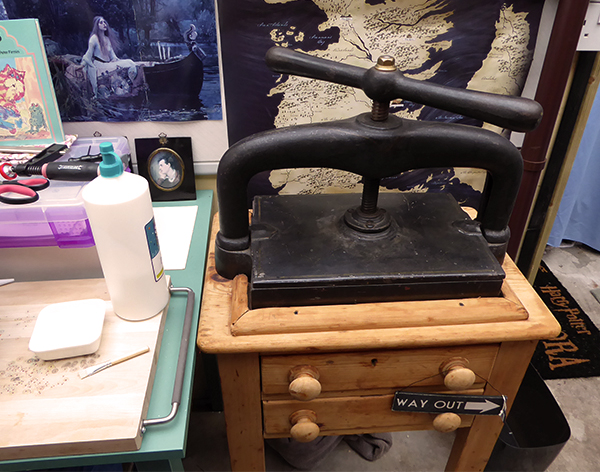
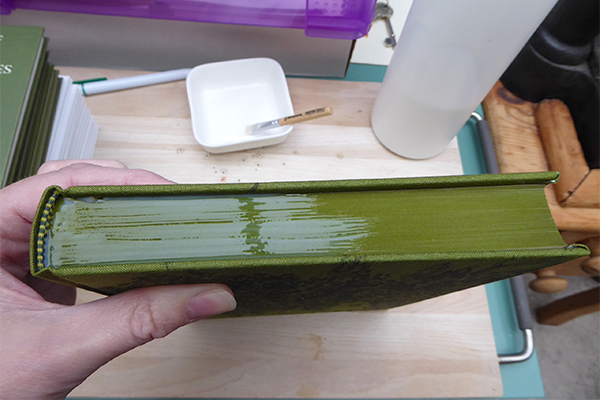
To hold the book tight whilst the glue dries and sets everything in place I use a Victorian book press. There were two at my local auction house when I bid for this and bidding was fierce. When I first made a clock I used two pieces of mount board and two C clamps to hold it all together, the weight isn’t as evenly distributed but it still worked and makes a cost effective alternative if you don’t already have a form of press around the house.
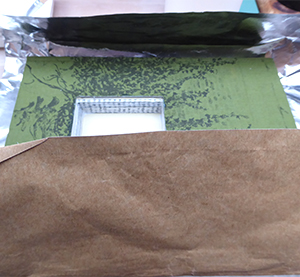
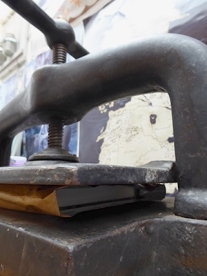
I wrap the book in greaseproof backed foil to stop the glue sticking but ensure the book is covered as the book press is over a century old and sometimes a flake of paint or rust might come free.
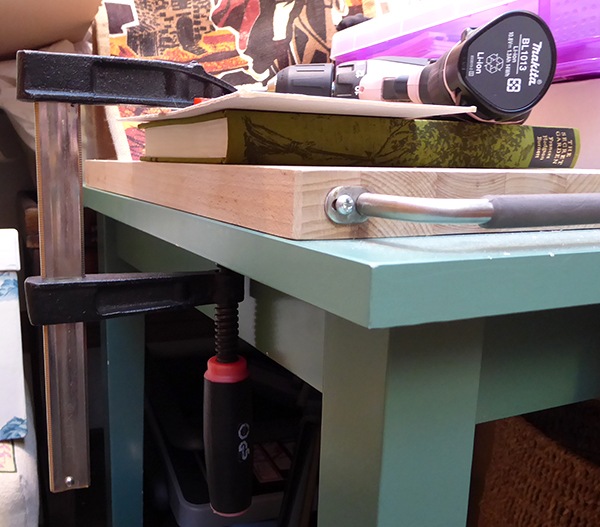
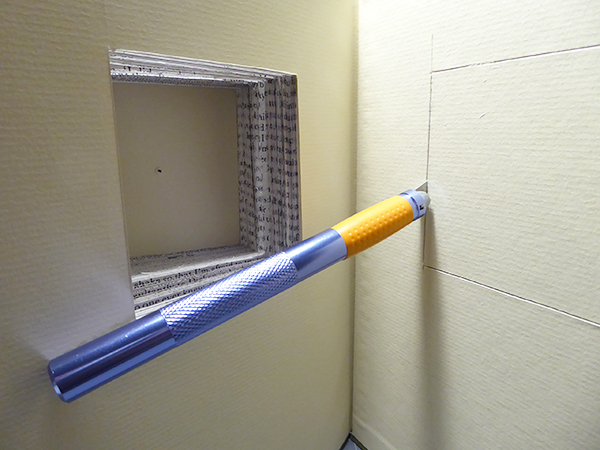
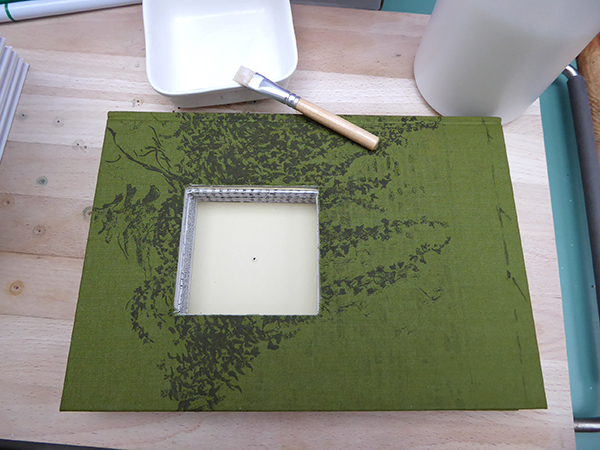
After 24 hours the book should be set so you can remove it from the press or whatever method of holding it together you have gone for. You’ll drill the hole to put the clock movement through from the back of the book so lay it front cover face down on a piece of wood on your work bench. Place a piece of thick card or mount board on top so that you can hold the book in place with an F clamp without marking the book.
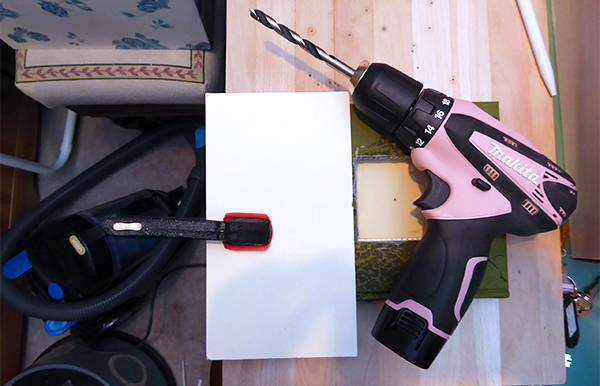
This is how it looks from the top. Note the vacuum cleaner on the floor – you will need one for the paper dust created when you drill. I use a lightweight cordless drill that I can easily control so I can adjust the speed and stop quickly if the card/paper starts to smoke. This isn’t usually an issue here as you are drilling the cover only. Sometimes I drill narrow books all the way through and it’s never easy to anticipate how combustible the different paper types might be.
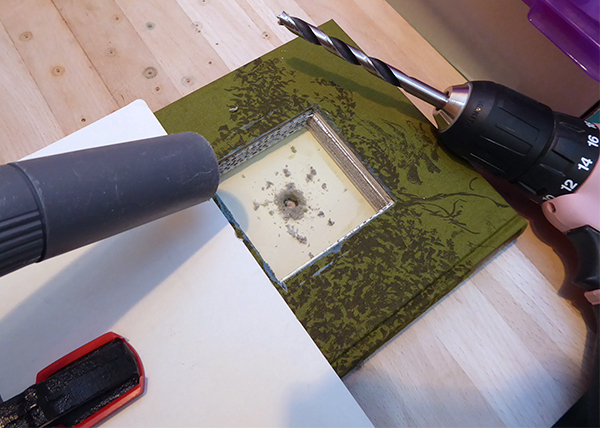
I use a drill bit designed for use with wood. I’ve tried multipurpose and personally find it doesn’t create as clean a cut.
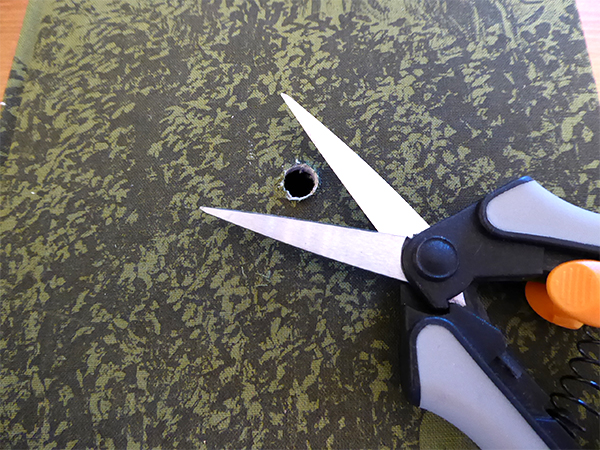
You can use sharp scissors to trim the hole as drilling often creates burred board or leaves parts of the cover design attached, especially if it is fabric or laminated.
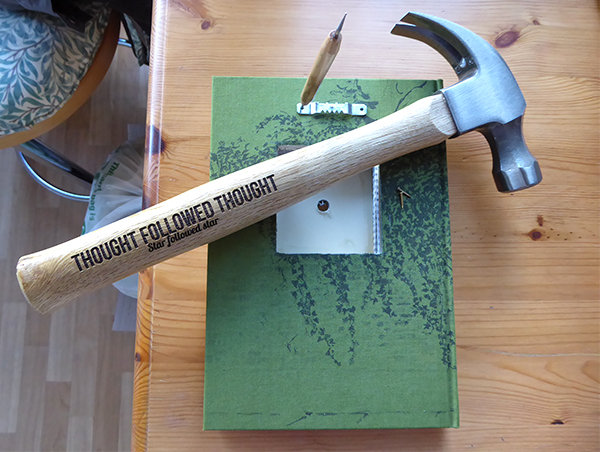
Before you fit the clock movement you need to attach a sawtooth style hanger to the back so that the clock can be hung from a wall. You should be able to buy these items at a local hardware shop. Mark the points to nail using a piercing tool first and it will be easier to ensure the nails go in straight and exactly where you want them to be.
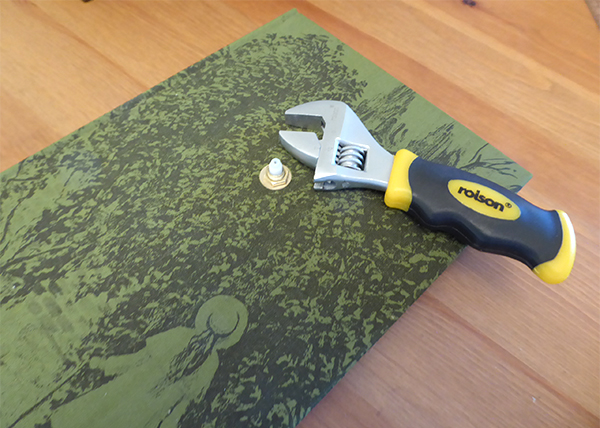
Insert the clock movement into the back of the book and secure the nut with a spanner. Most movements will include a rubber washer to put between the movement and the book cover at the back and a brass washer to fit the nut against on the front. I bought my first clock movement from a local craft store but you can easily search online to find a supplier.
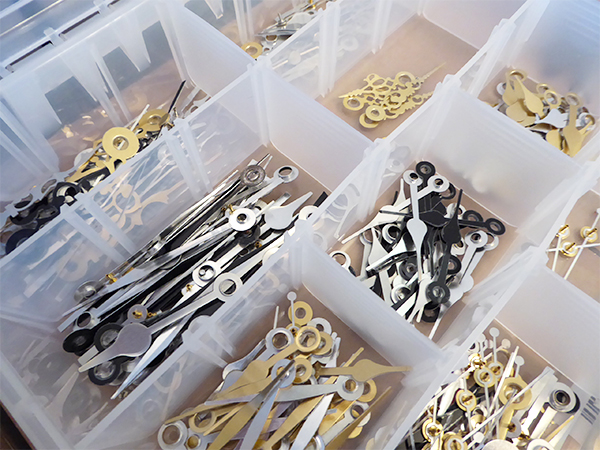
Depending on where you purchase it from you may have a choice of hand designs and colours. The hands usually have a plastic covering you peel off before you fit them. With the type I use I fit the hour, minute and then second hand. You will be able to tell which order they should go in by the size of the hole and the instructions that came with the movement you have purchased.
I hope you enjoy your finished clock. One of the first clocks I made was this from Books In The House.
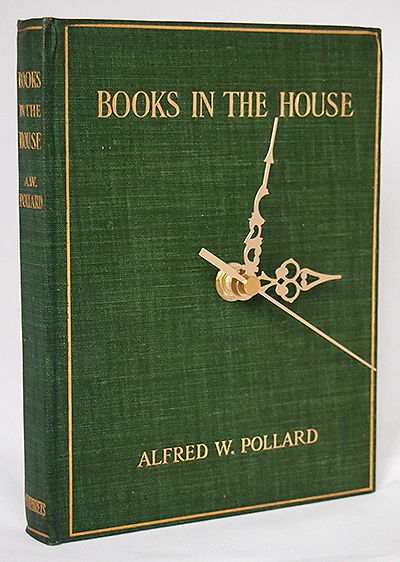
It is still going strong in the living room 5 years later. I’ve only had to replace the battery a few times.
The clock shown in this how to guide was sold from a stall at an artisan market in November 2017 .